Bit1
Bit1 is the next evolution of the Ceti program. I decided it warranted a name change as I've gone from 5v TTL to 3.3v CMOS based on some 68SEC000's I bought off AliExpress. This opened some new doors in the way of RAMs and Flash chips.
These 'SECs are QFPs and a quite a stretch for my hand-soldering capabilities. The CPU board does work as far as its been tested, but I want to have a stencil made and use some paste with hot air to assemble any more copies. Same deal with the memory board - took two attempts to get a memory board that works as the pitch of the RAM chips turned out to be tighter than I had expected.
The I/O board has been created, but after the bare boards arrived I realized there was no way I was going to be able to hand-solder the UART and mux chips I'd designed in. Footprints have been updated in the layout and larger parts purchased. But I also added a bunch of 33-ohm series resistors on the data and address lines, so I'm bogged down in layout. Routing a board is my least favorite part of hardware design, so its not something I work on very often.
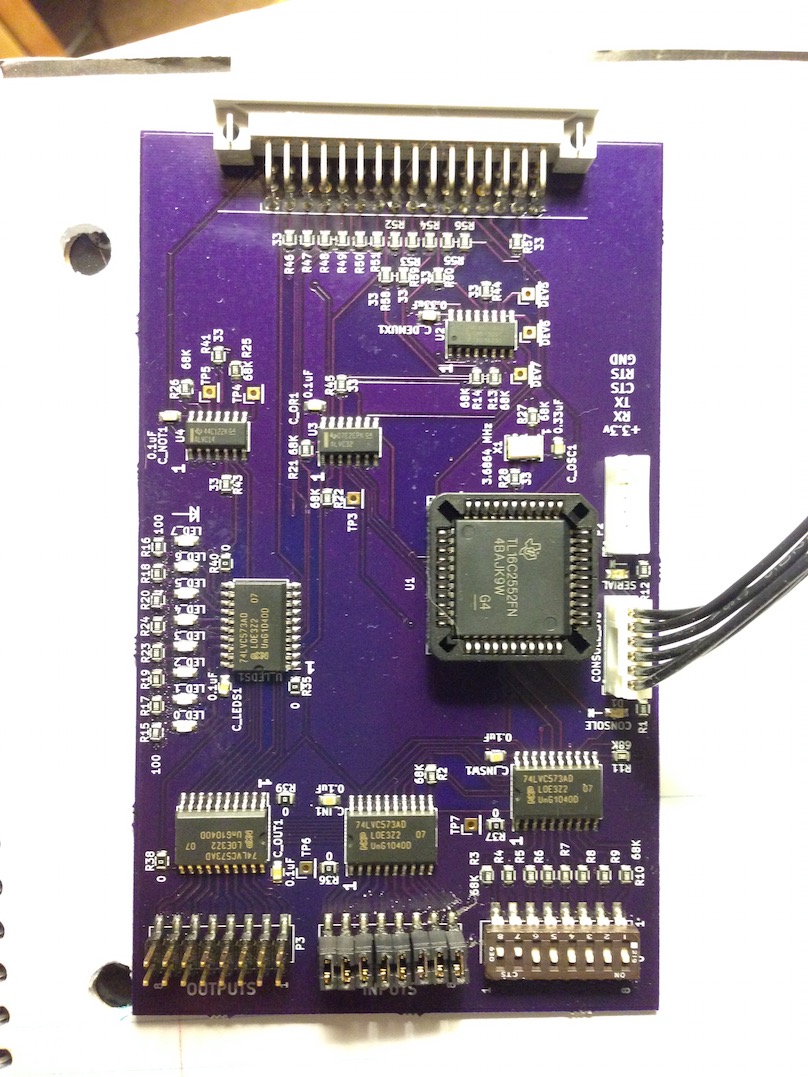
Update (August 2018): The I/O respin has been completed successfully. Layout completed at the end of May, 2018. Bare boards were ordered from OSH Park and the paste stencil ordered from JLCPCB. Both arrived in June, assembly was performed in my garage using paste and hot air shortly thereafter. This worked exceedingly well; I'm very happy with the quality of the solder joints and the time saved versus hand-soldering. These "Rev. B" I/O boards work great and I now have UART interrupts working! This is terribly exciting because it represents the first time I've gotten interrupts implemented and working in one of my 68K systems. It looks pretty cool if I do say so myself :-)
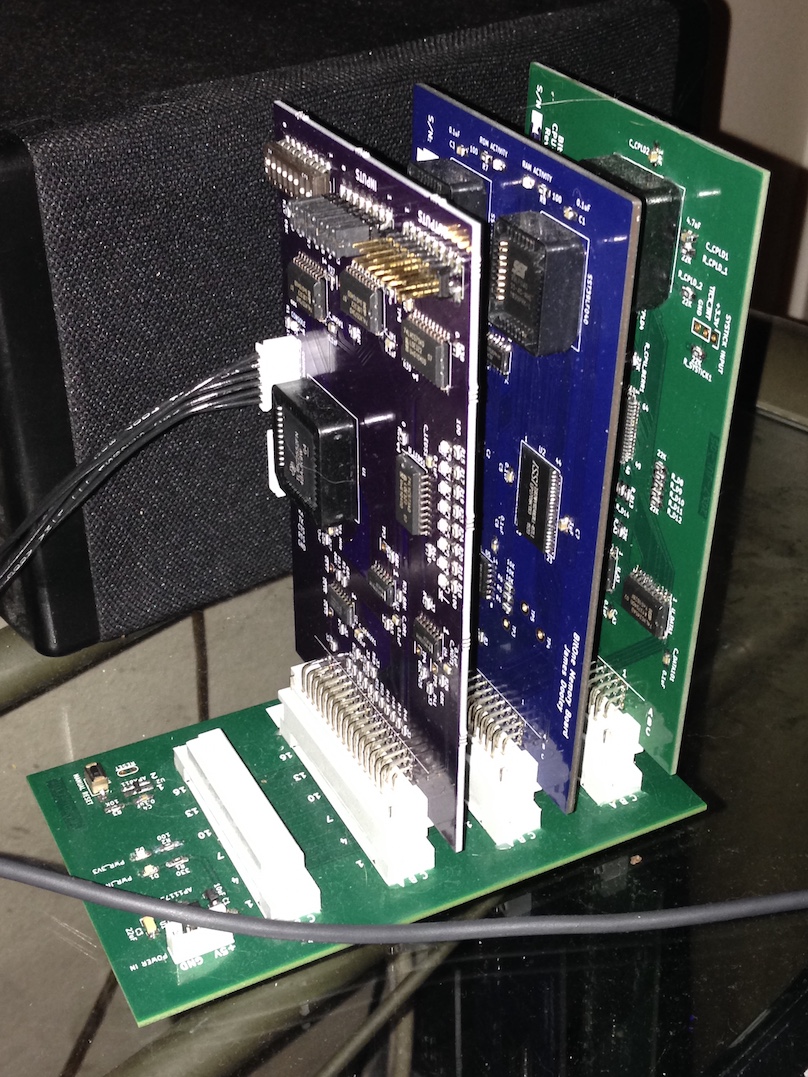
The assembled Bit1 base board:

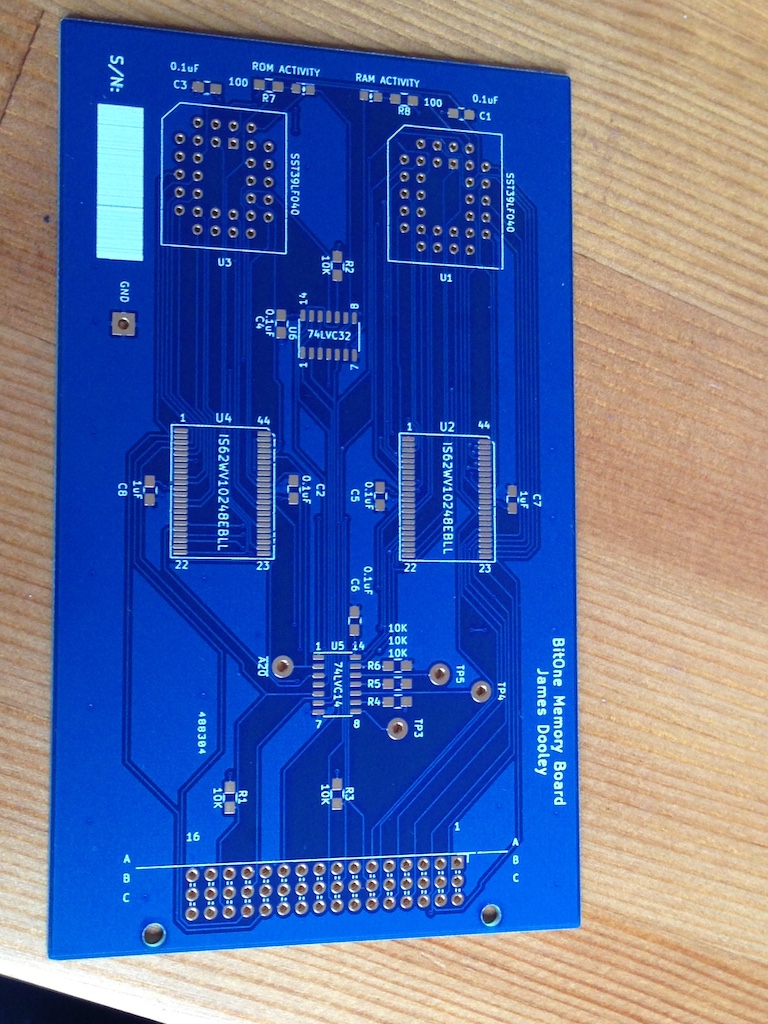
The bare Bit1 memory board:
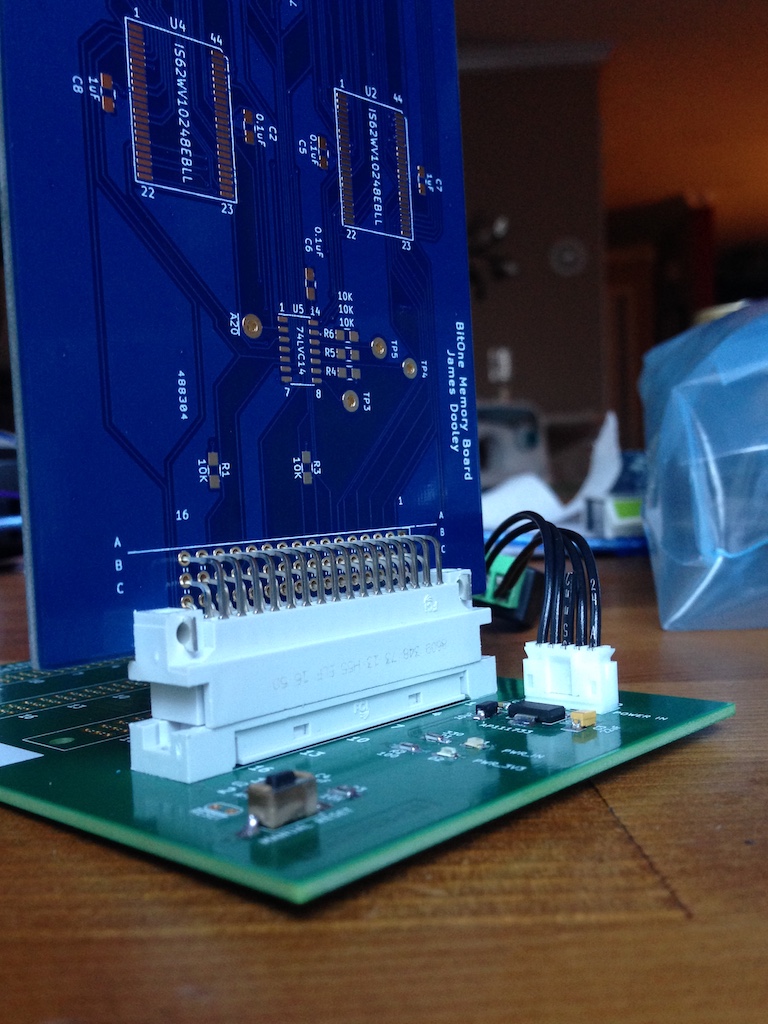
The Bit1 memory board being dry-fit in the base board:
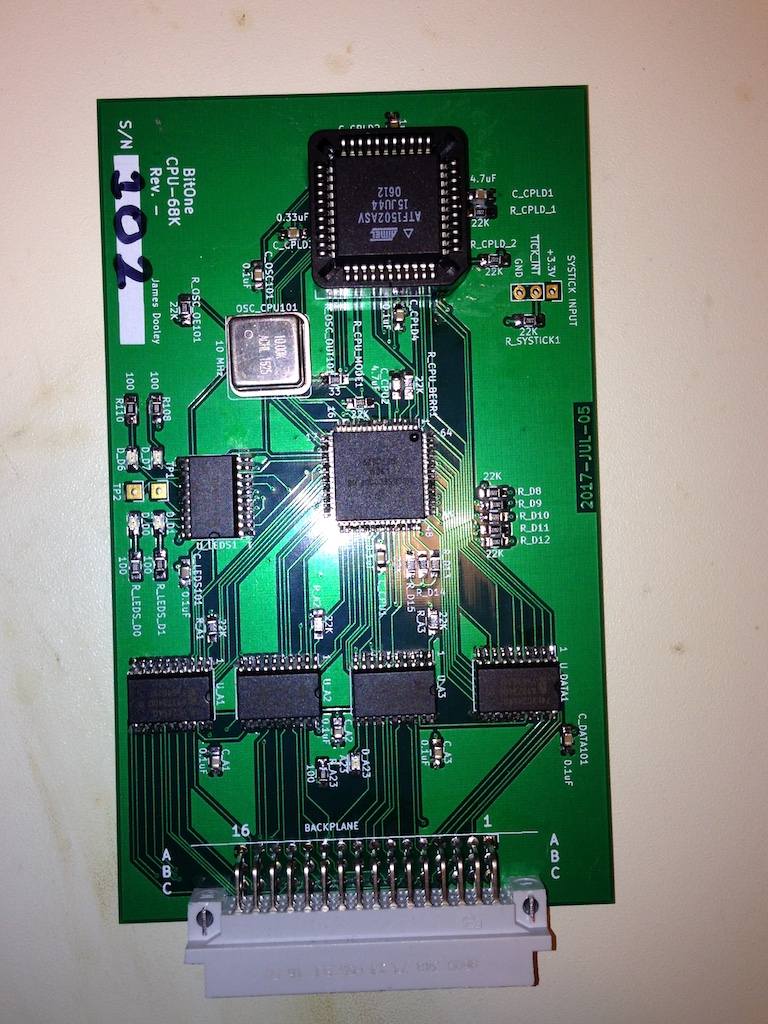
The assembled Bit1 CPU board:
The respun I/O board:
The full Bit1 system so far: